Categories
- Plastic Self-Inking Stamps with Text
- Plastic Self-Inking Date Stamps with Text
- Reiner Time Daters Numberers & Electronic
- Metal Self-Inking Stamps with Text
- Traditional Rubber Stamps
- Metal Self Inking Date Stamps With Text
- Ink Pads
- Rubber Stamp Band Stamps
- Company Seals & Embossers
- Pre-Inked Stamps
- Number Stamps
Links


Welcome to Custom Rubber Stamp.
Here's how to order a rubber stamp using our site:
1) In the left side menu you'll see a list of the different categories of stamps on offer, select the type which suits you best. Let's start with the simplest case and select the 'Rubber Stamp Band Stamp' category; click on that one. If it is a text stamp that you need, continue to item 6 below.
2) You'll find this has sub-categories split between rubber stamp daters with abbreviated English months sizes 3 - 12mm character sizes, date stamps of your and numbers or dates, so pick the one you want and you'll find the different models listed for you.
3) Click on the one you want, and you'lll open up a new page for it, click on the picture to see a king-size version and sample print shown against a ruler so that you can assess it correctly.
4) If satisfied click "add to cart" and off it will go! (I'm a simple man and I could sit here all day just adding things to the cart - just love watching it - sad eh?)
5) If you want an ink-pad to go with your stamp, click the "Accessories" tab above the stamp picture and that will show the ink pad which again you can add to cart if you wish to purchase a black one. If you need a different colour click "View" which will open the ink pad page and you can select the colour from the buttons provided at the side of the picture.
6) If you want your own wording on a stamp then you will have clicked on one of those categories, pick the size of stamp that you need and once you have that page open you are ready to tell us what you want the stamp to say.
7) Some web-sites have fancy DIY design functions, some require that you send in details of your design separately, both methods have their place and do work but I have found that if you are unfamiliar with computer graphics some of the "design your own stamp" functions which I have tried can be a nightmare to find your way around - work out your size etc.
I will ultimately add a design function (because it saves me work) but for the time being I'm working on (what I think is) the simple method of you telling me verbally what you want and how you want it set out - here's how:-
8) Above the stamp picture you'll see a button "Product Customisation" click that one and a page will open up with a set of boxes. The top two boxes give you the opportunity to send us a design which you may have done yourself or it can be a scan of an existing stamp. Please use GIF, JPG, PNG file formats for the time being (I'm working on .pdf but haven't quite got there yet). The reason I've put two boxes for you to use for uploading is that you may have a stamped impression which has your Company logo on it, this stamped version will not be good enough for us to use to create your stamp so we will need a minimum 300 dpi file of the logo preferably in black & white as that is how stamps tend to work. We can convert coloured images but it isn't always clear which colours should be and some colours we have made white you may have preferred black and vice-versa.
9) The "Text" boxes are the hub of this system. Here you can write the words which you want on the stamp, and on each line you can add instructions for that line - put the instructions in [square] brackets (nothing inside a square bracket will be included on the finished stamp). For example if you are doing an address stamp you may want your Company name in a larger font or bold or both! So in the first box you would type;
Custom Rubber Stamp [LARGE, BOLD, CAPS] which would appear on the stamp as CUSTOM RUBBER STAMP.
10) Carry on like this for as many boxes as you need, you can put more than one line of text in each box if you find it easier, basically you have carte-blanche to work however you like – just remember the formatting instructions in the [square brackets].
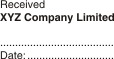
Another example: let’s say that you wanted a signature line, you have three boxes with a line of text (or one box with three lines), in the next box you could type [space] then underneath a row of dots like this:
Text box 1: Received
Text box 2: XYZ Company Limited [bold]
Text box 3: [space]
……………………………
Text box 4: Date: …………………….
This would produce:
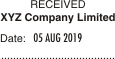
If you wanted “Received” centred and in upper case then merely add [centre, upper case] to Text box 1 and if it is a stamp with changeable date put [date] in the box where you want the date. Let's do this again and I'll show you what I mean.
Text box 1: Received [centred, caps]
Text box 2: XYZ Company Limited [centred, bold caps]
Text box 3: Date [changeable date]
Text box 4: [space]
..........................
gives us this version:
11) The last box can be used to give any further instructions which may affect the whole stamp. To save typing the same instruction in each line, type it just the once here. Examples of this could be [text centred, border, courier font, grid stamp with text left and centre line, position logo in top left corner] just a few examples but the variations offered by this method are virtually infinite. We can of course put circles or ovals or any shape on a stamp either as a design or as a border shape - just tell us what you want and we can send you some sample proofs.
12) If you think the design is somewhat complex please request a proof to be sent. If we are in any doubt as what you want we will do that as a matter of course anyway but it does no harm to ask.
13) After you have completed the above don’t forget to click the “Save” button which is below the column of boxes.
14) If you would like more than one stamp amend the quantity and if it is a self-inking stamp select the ink pad colour which you require.
15) Now you are done – click “Add to Cart” and off you go.
I hope you’ve found this informative and please contact me with any comments/improvement suggestions. Everyone who has ever designed a system thinks that it is easy and of course it is, to them, because they have been working on it for weeks, maybe months, they know all the wrinkles and take things for granted because they know it so well. I’ve tried to lay this out logically and as simply as I can…….enjoy
-

- -30% £ 50.75 £ 35.52
![]()
Contact us
- CustomRubberStamp
B22, BizSpace
2 - 8 Airfield Way
Christchurch  BH23 3TS
- Tel: 01425 517678
- Email: sales(at)123stamps.co.uk
Follow us